I’m making steady progress on my walk-in closet. I finally had to take a day off on Friday, though. I had been working for two weeks straight without a break on the closet, and my exhaustion hit a point on Friday that I decided I needed to take one day to rest before I injure myself. So on Saturday, I was able to get to the fun stuff — adding trim to the boring plywood boxes and shelves. I was so excited to finally get to this point because it’s the trim and molding that make the most difference.
This is only one part of what will be a very long series of posts on my biggest built yet — my walk-in closet and laundry combination. If you missed the previous post, you can find that here: Closet Progress – The Basic Build Is Finished!
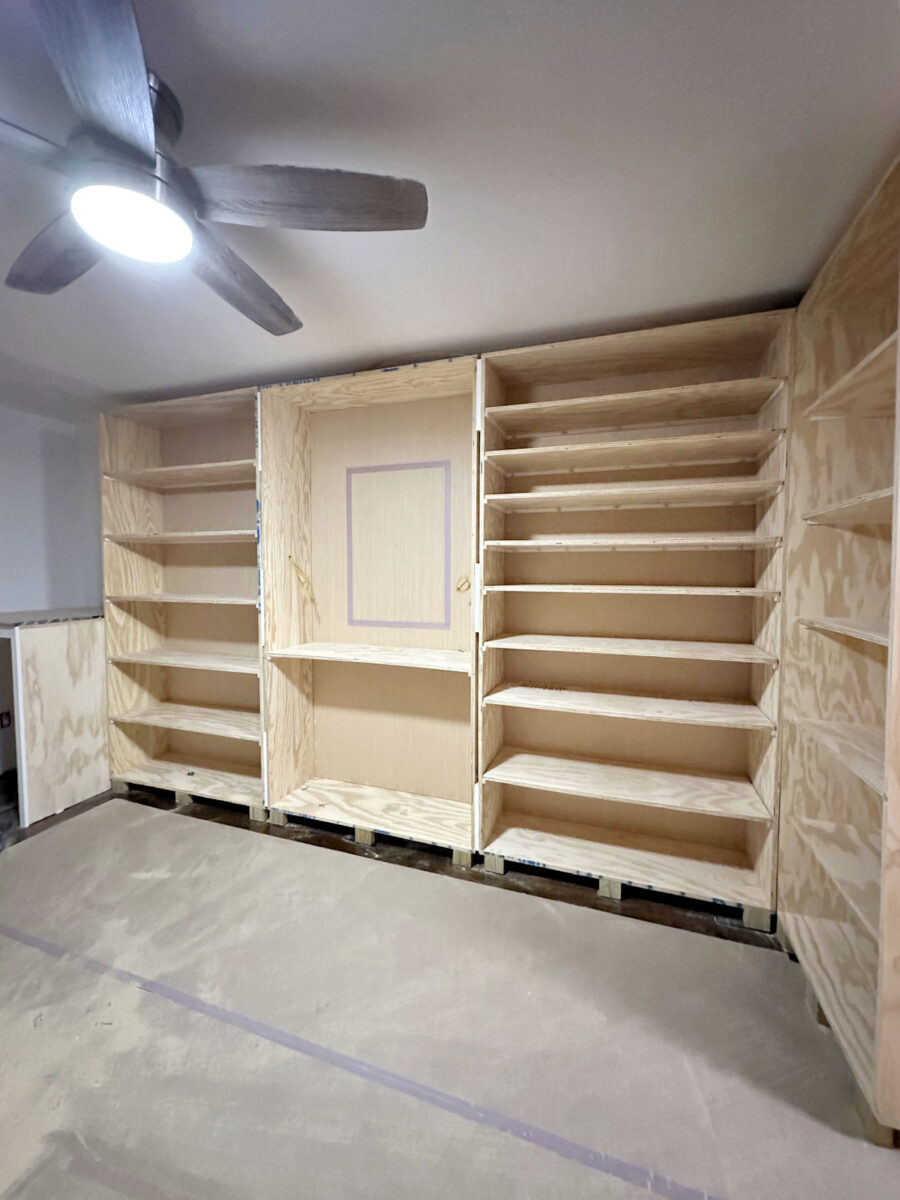
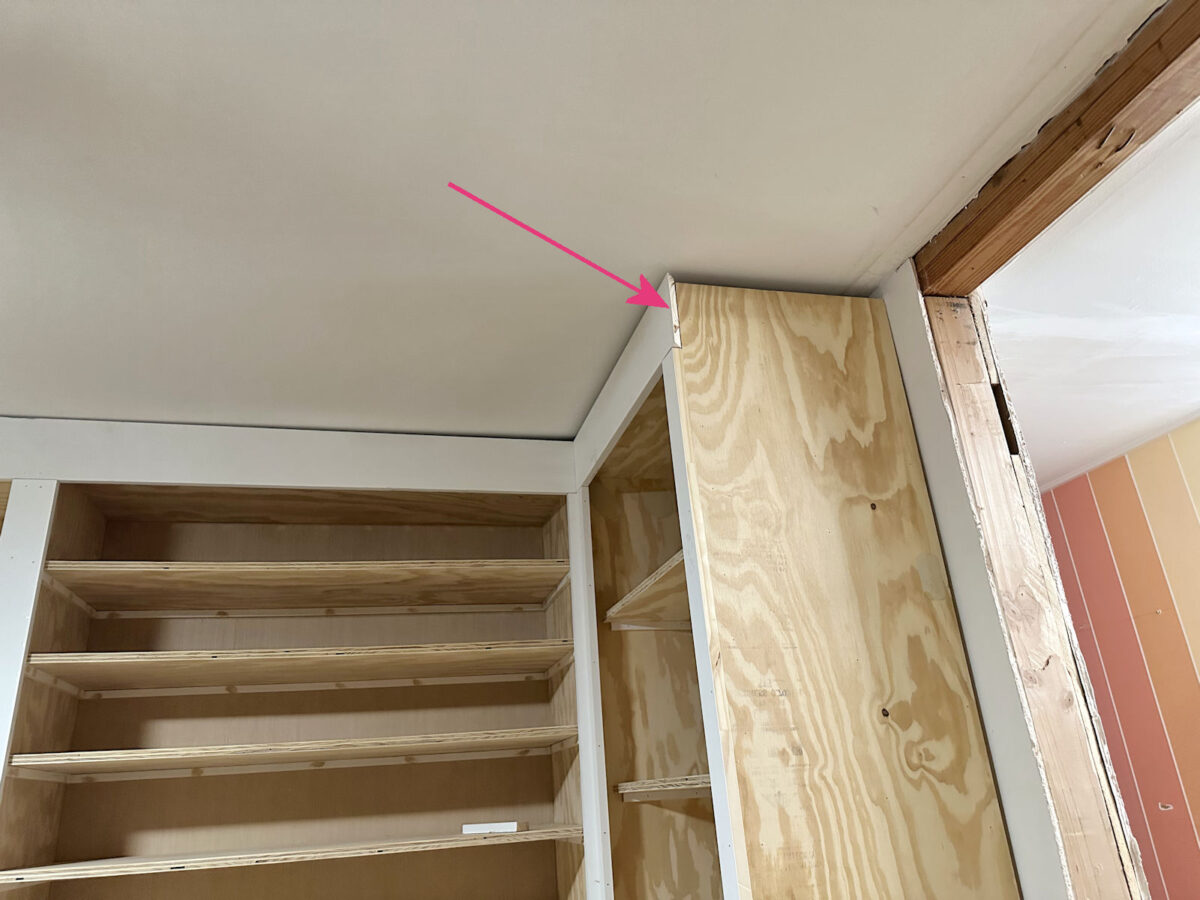
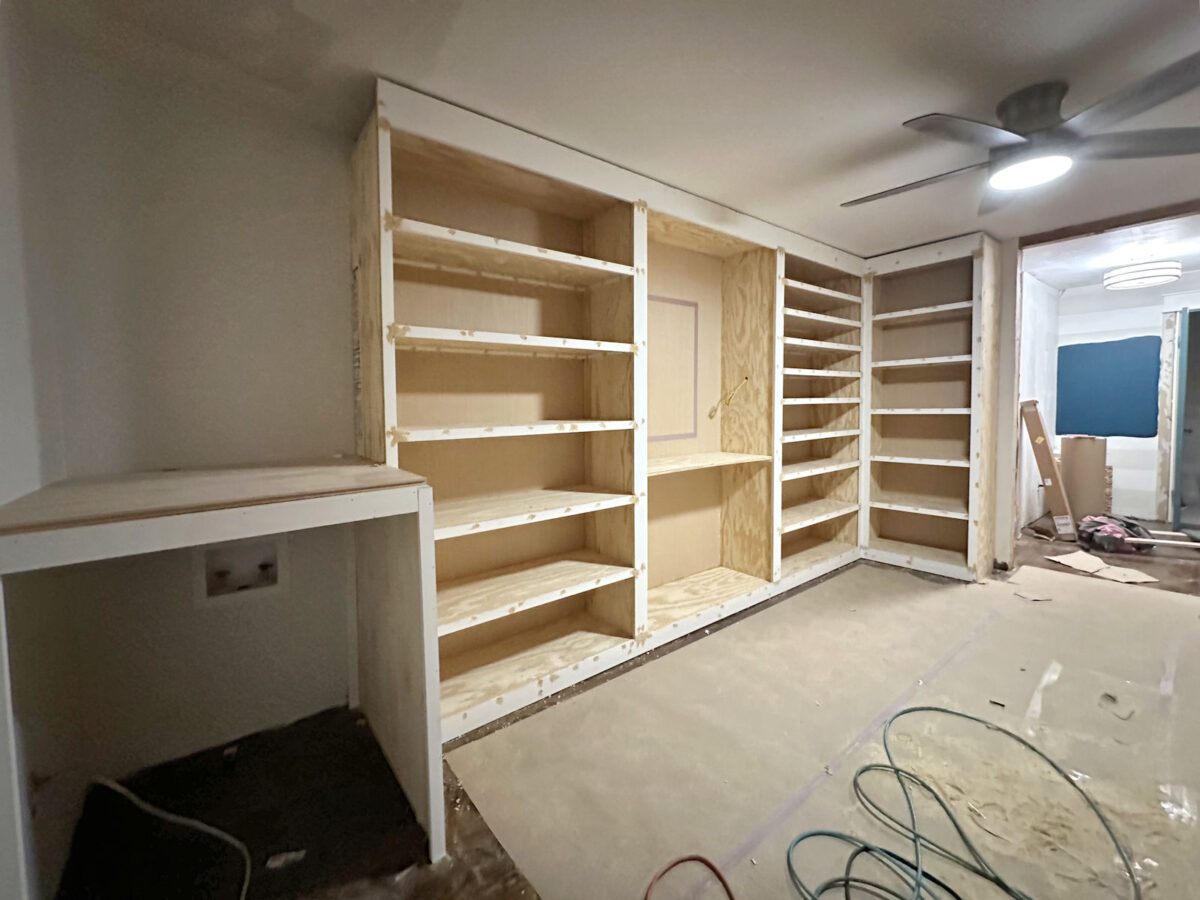
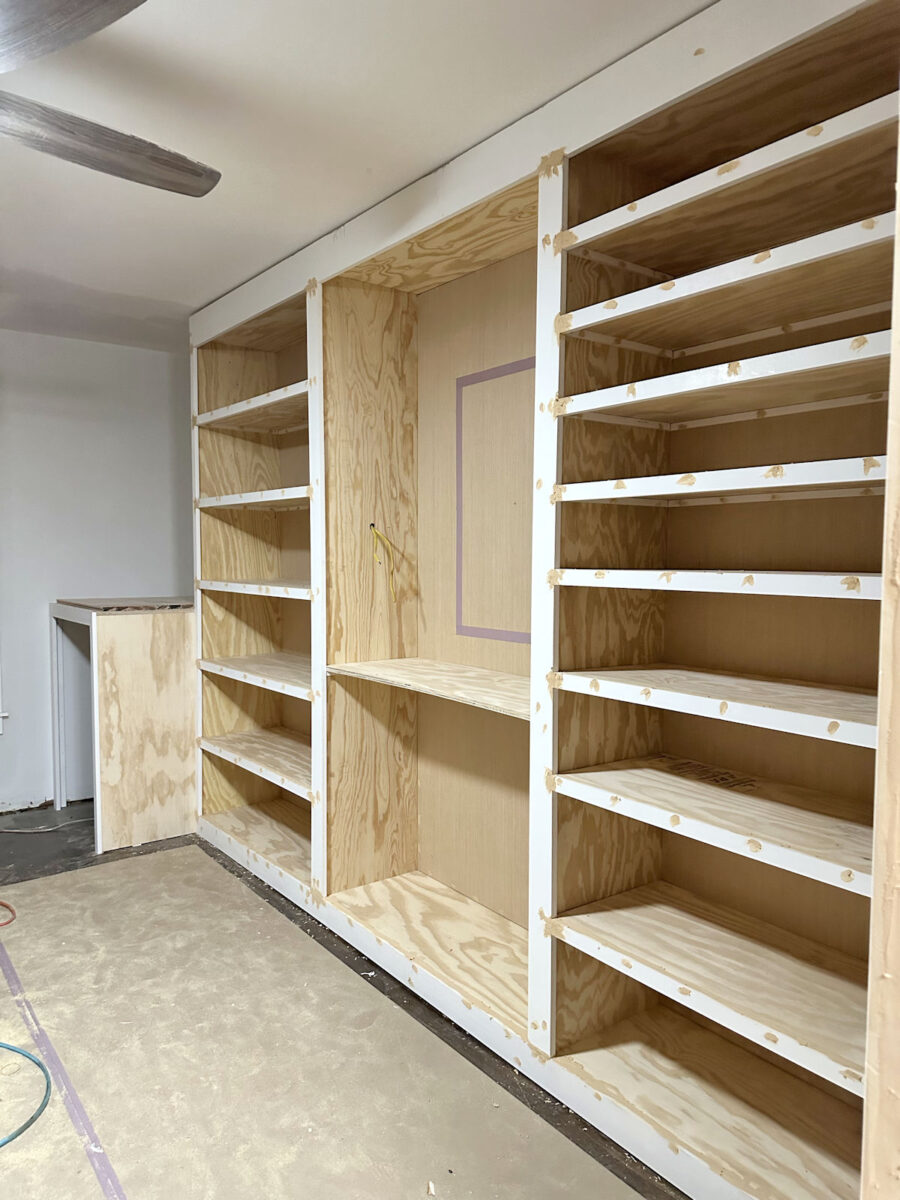
After finishing the basic build on this closet, this is what the cabinets looked like…
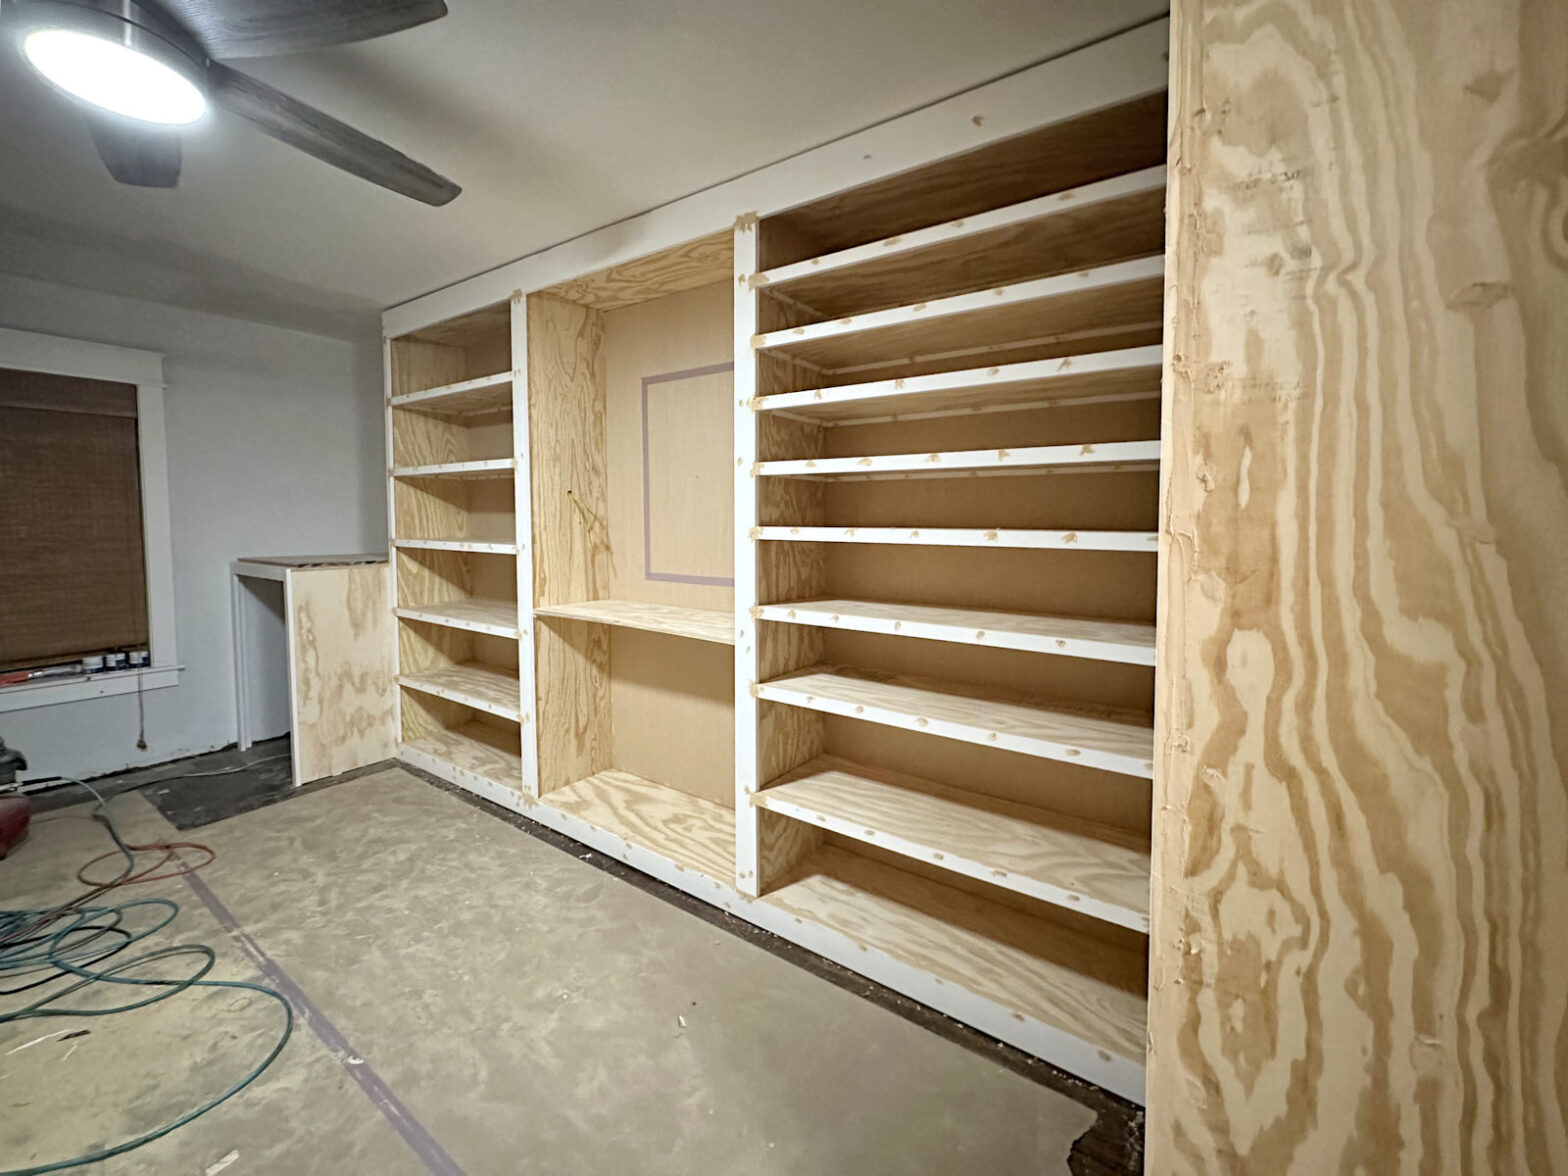
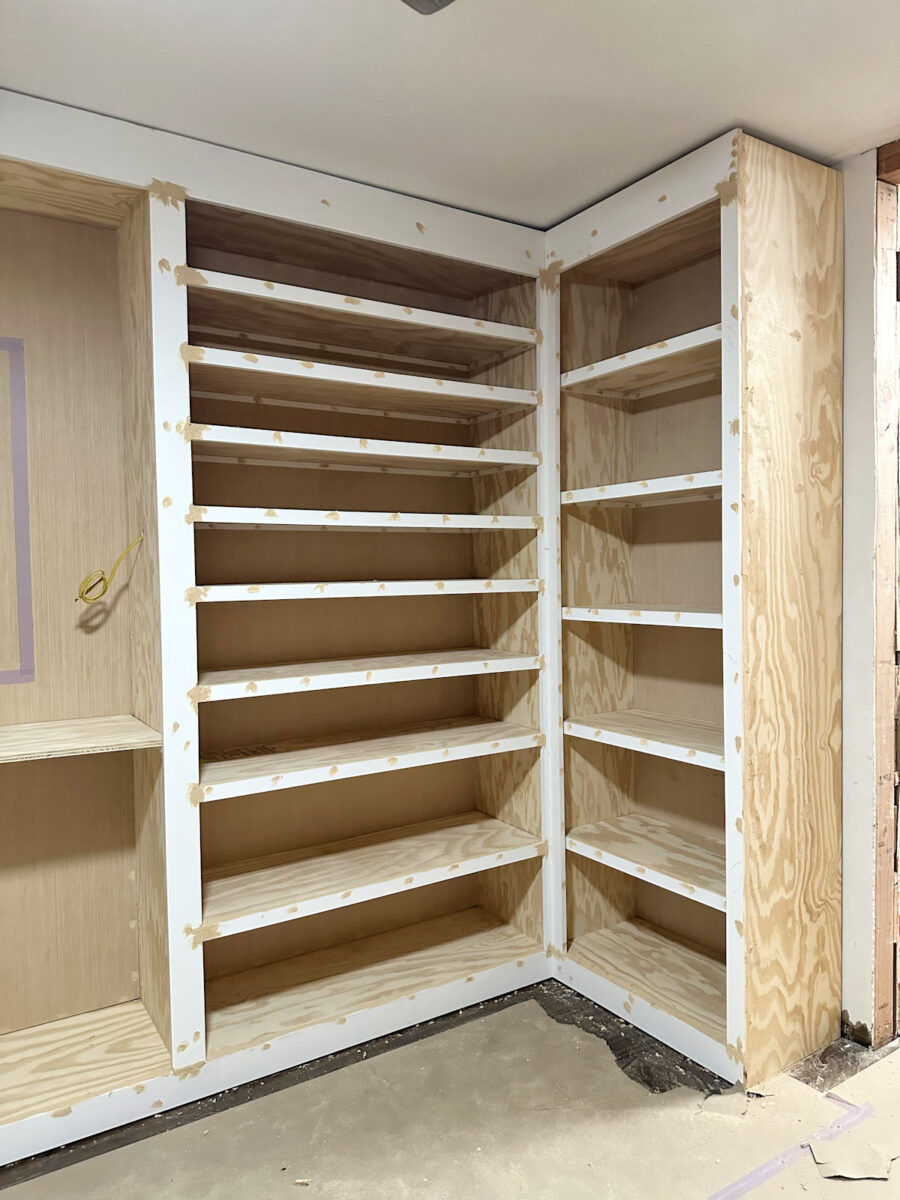
And because it’s the side that requires the most trim, I decided to start to start trimming out the right side of the room first.
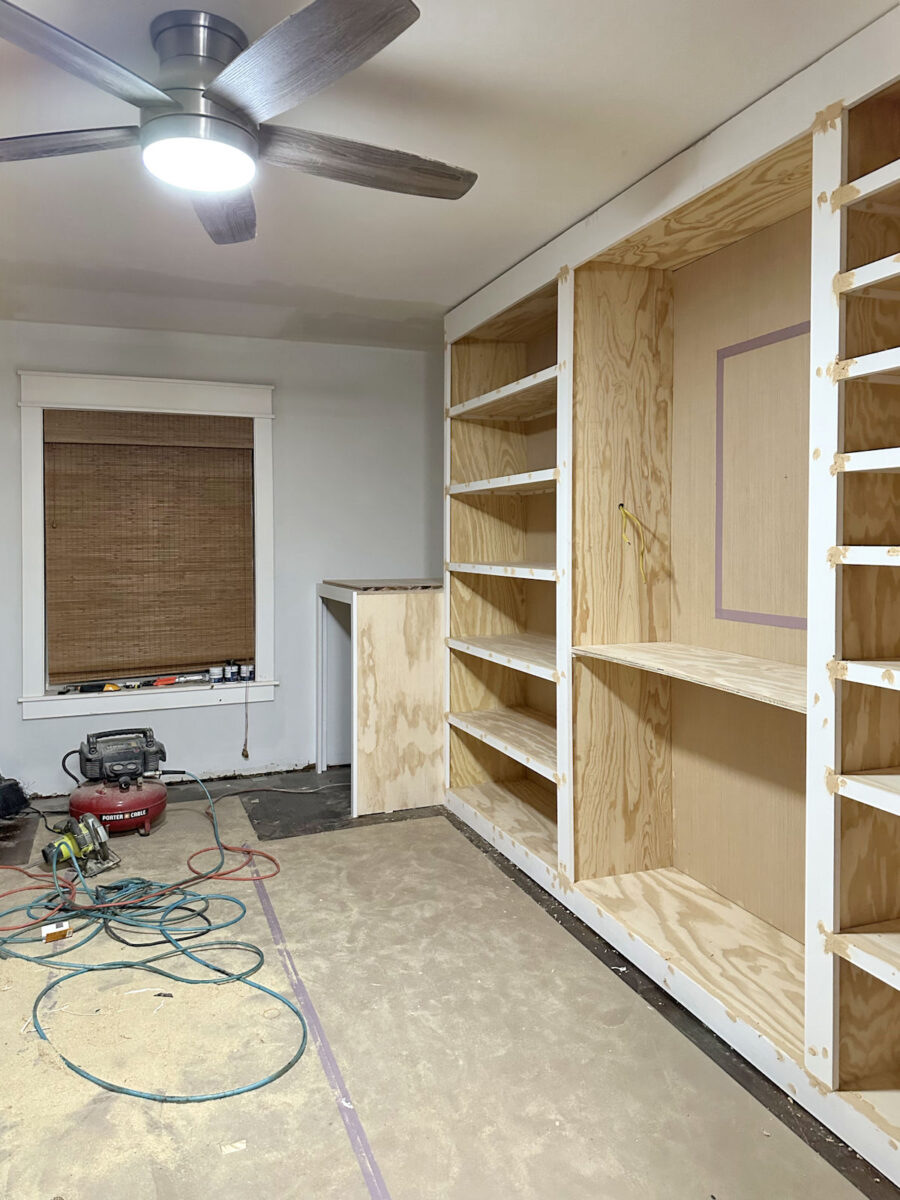
Here’s what that side of the room looks like now with all of the trim attached. I still have to install the molding — the baseboards along the bottom and the crown molding along the top.

To trim out this side, I started with the longest horizontal pieces. On the bottom, I used 1″x4″ pre-primed lumber.
And along the top, I used 1″x6″ pre-primed lumber.

I made a mistake right from the beginning because I mitered the outside corners of the top 1×6 boards. Those should have been cut straight. But I was working alone, and wrestling that 140-inch into place and nailing it into place, there was no way I was going to take it down to cut it straight. So I decided to ignore it at this point and take care of it in a later step.
With the two top and bottom horizontal pieces in place, I then attached the long vertical pieces. I nailed all of the trim in place using 16-gauge 2-inch nails through the face of the trim pieces and into the edges of the plywood. I used 1″x2″ pieces for the two outside vertical pieces, and then 1″x4″ pieces for the two on either side of the center section. But before attaching those, I used my table saw to rip them down to 3.25″ wide so that they just covered the edges of the plywood boxes as well as the ends of the shelf supports.
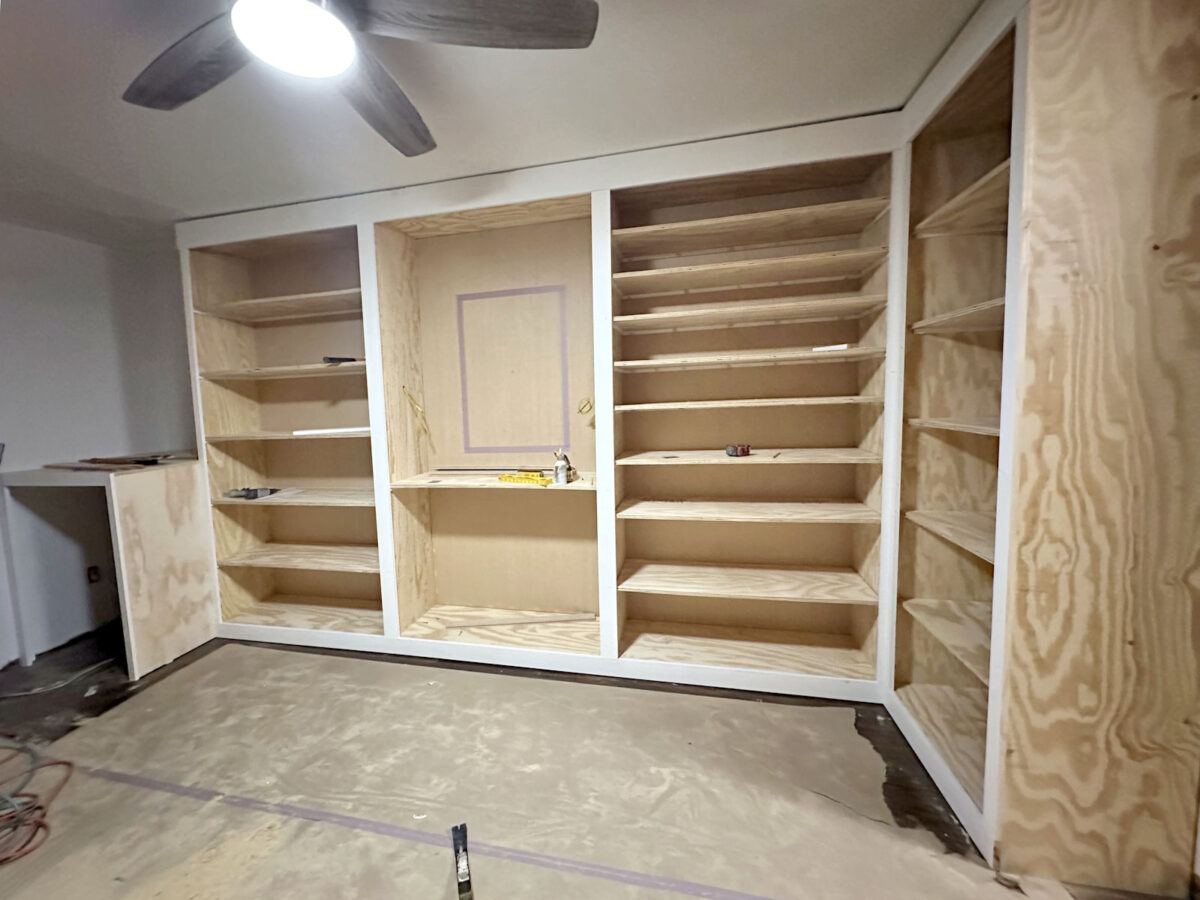
And finally, I used 1″x2″ lumber to cover the edges of the shelves.
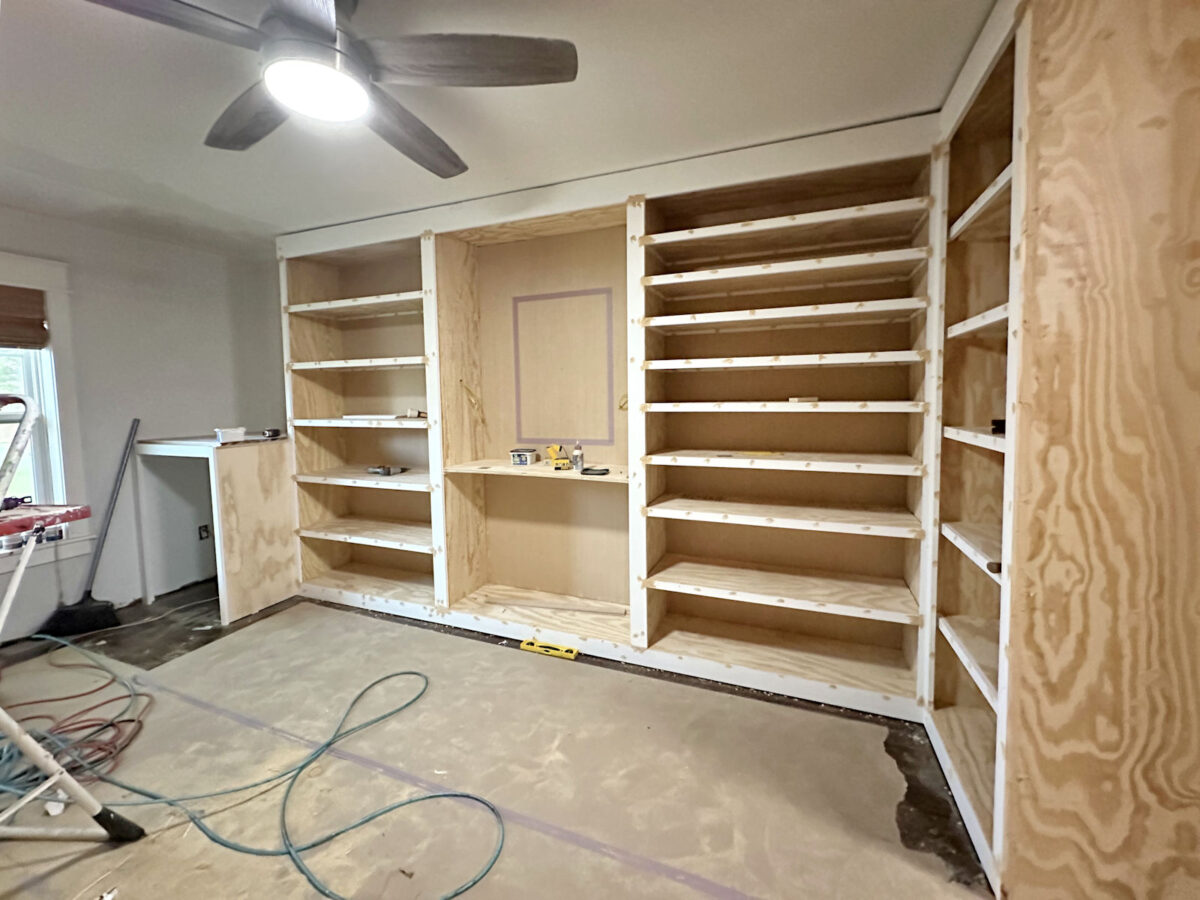
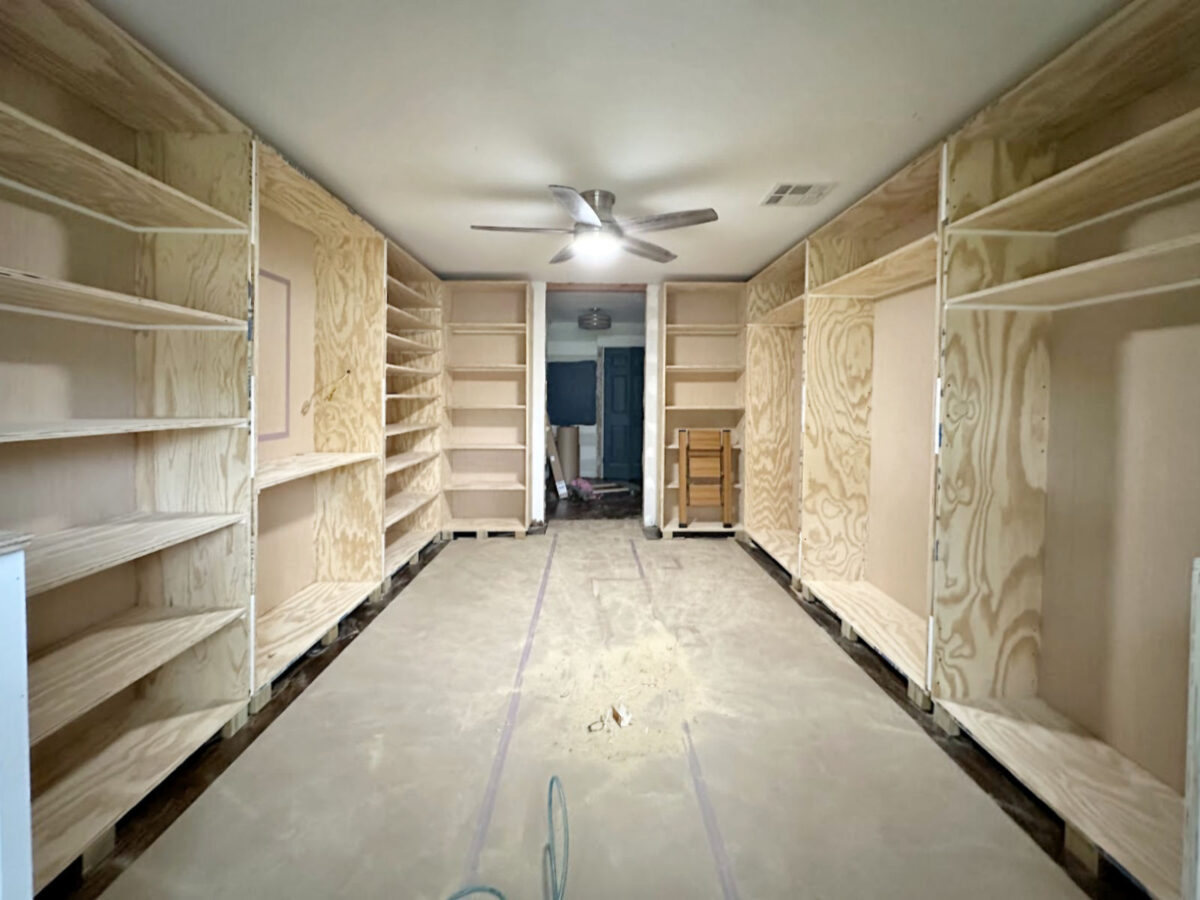
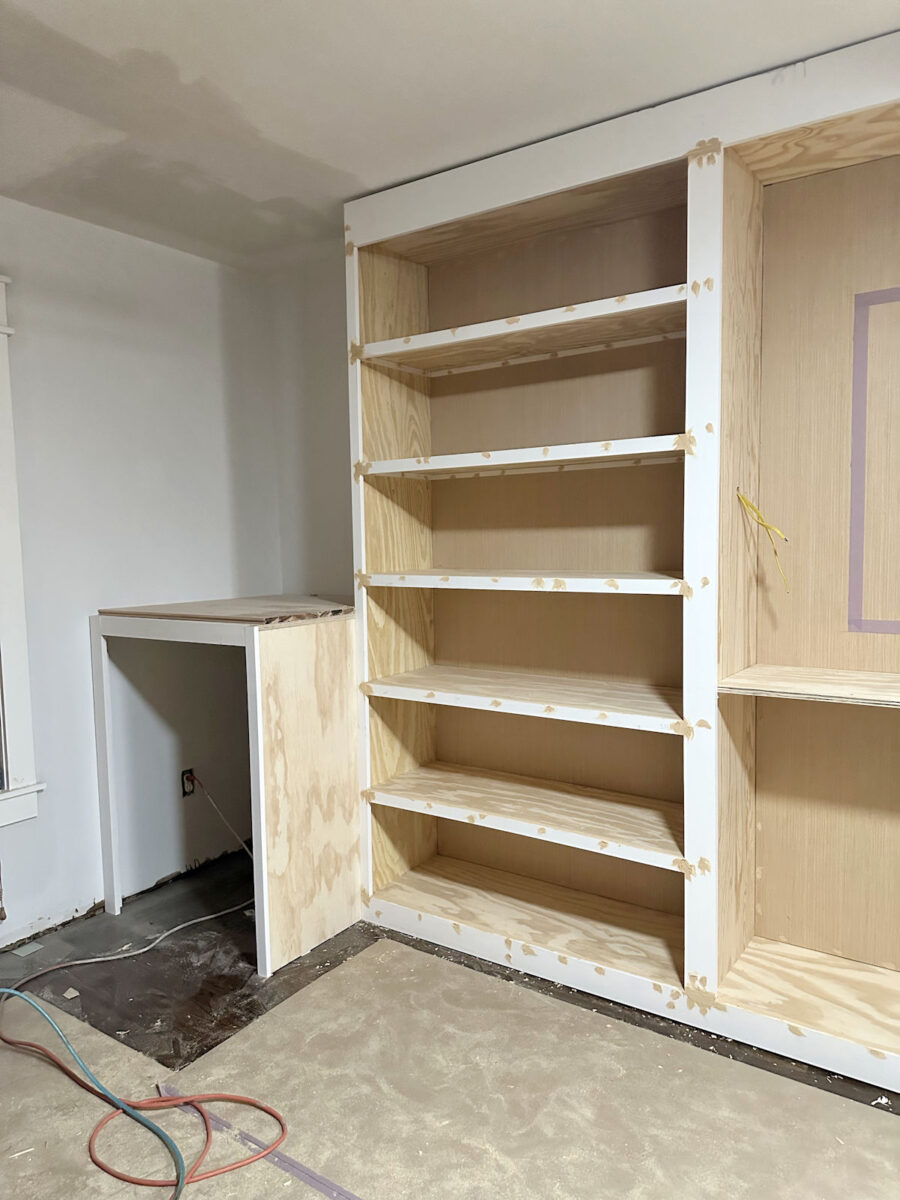
Here’s a look at the progress from the other direction…
I did all of the wood filling as I went, and if you’ve been around for a while, you know that I use wood filler very liberally. I do this for two reasons. First, wood filler shrinks as it dries. So if you try to put it on perfectly smooth, it will shrink into the joints and screw holes/nail holes as it dried, requiring a second coat. I avoid having to do a second coat by kind of mounding it up on the joints and screw holes/nail holes. But also, I use my rotary sander to sand all of this smooth once it’s dry, so my sander makes very quick work of removing all of the excess and making those joints and nail holes/screw holes very smooth.

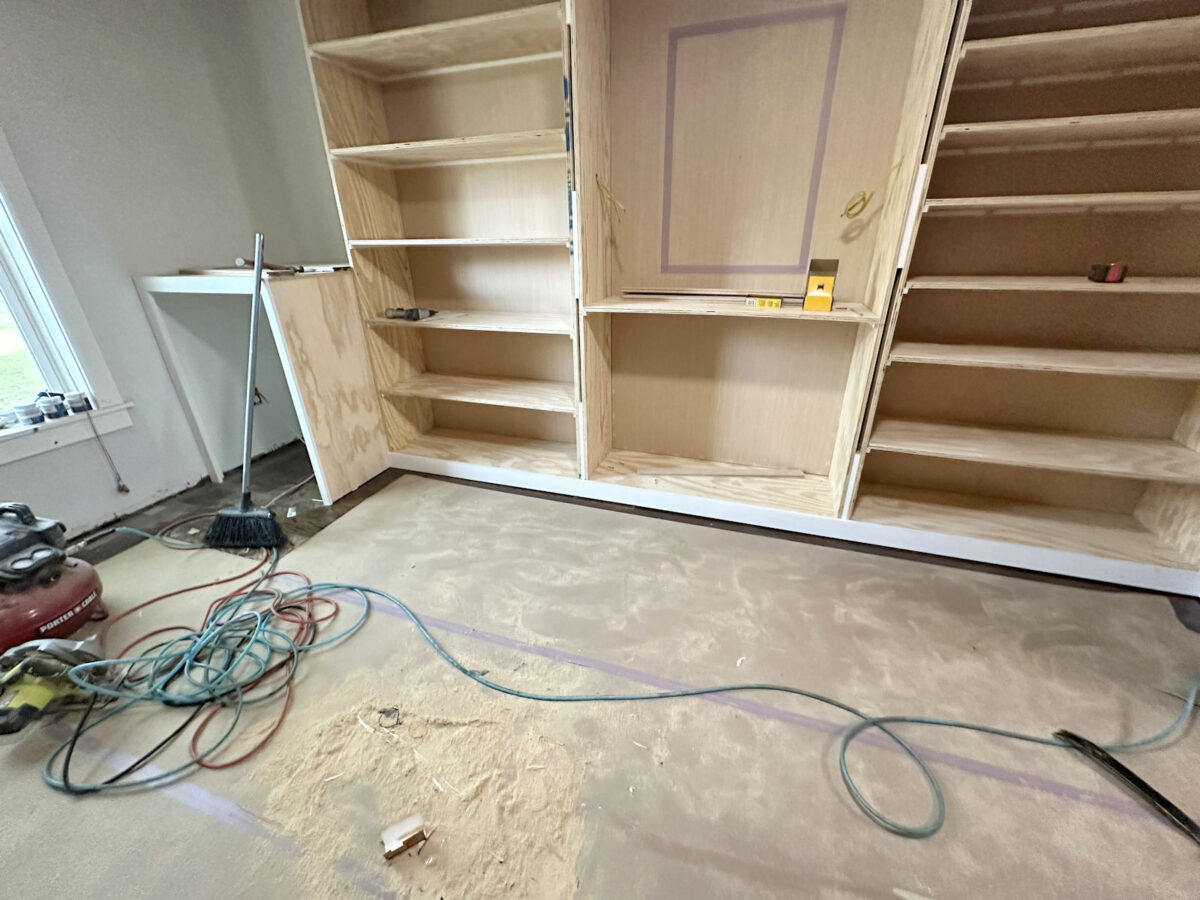
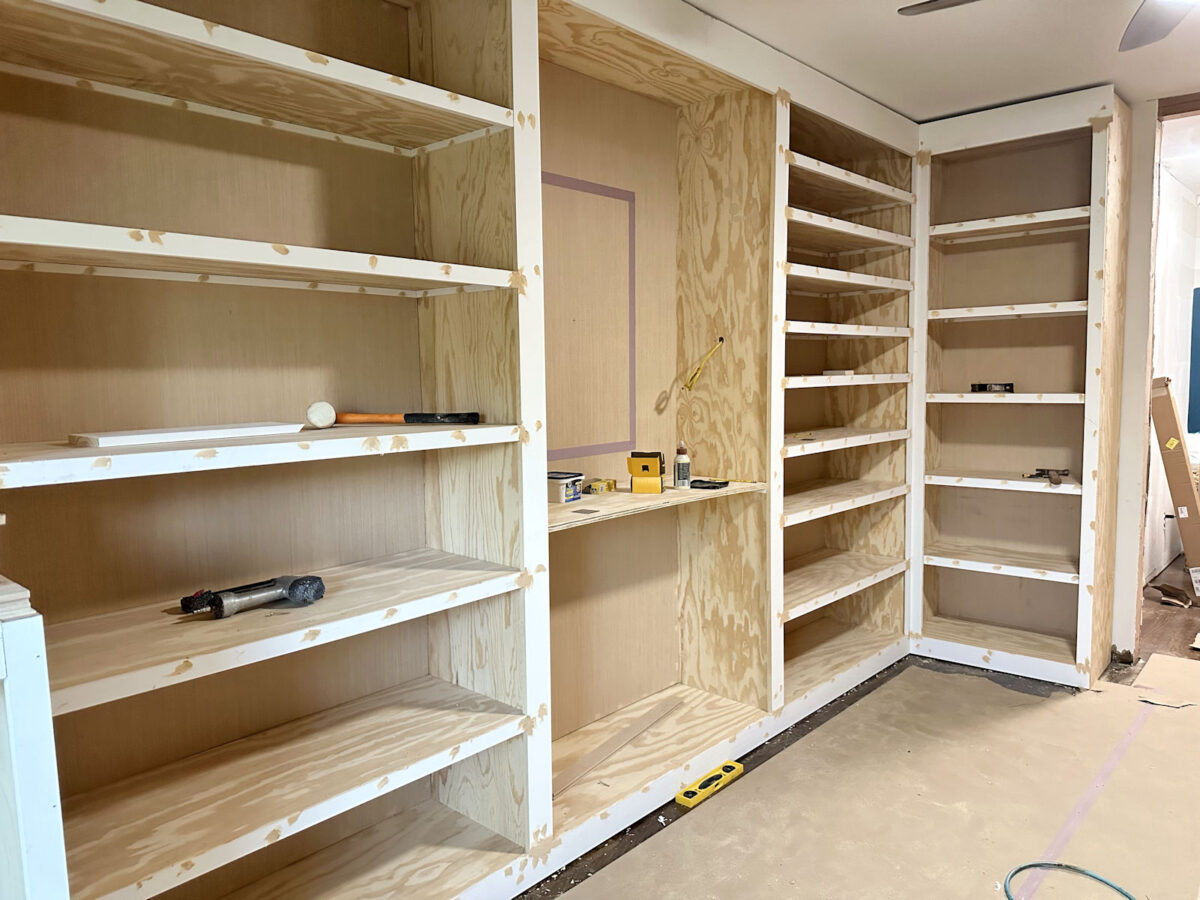
So I ended my weekend by making sure that all of those joints, nail holes, and screw holes had been filled with wood filler.

I only use wood filler to cover nail holes, screw holes, and joints where two pieces meet on the same plane. In other words, if it can be sanded smooth with a rotary sander, I use wood filler. If two pieces meet at an angle, for example, where the shelves meet the cabinet boxes, those areas get filled with caulk. I didn’t get to that step yet, and these cabinets will require lots of caulking before I can prime and paint.
So you’ll notice that I only used wood filler on the face of the trim where they meet on the same plane. But I did not use wood filler where the two trim pieces meet on top of the shelf and form a 90-degree corner. Those areas will be caulked.
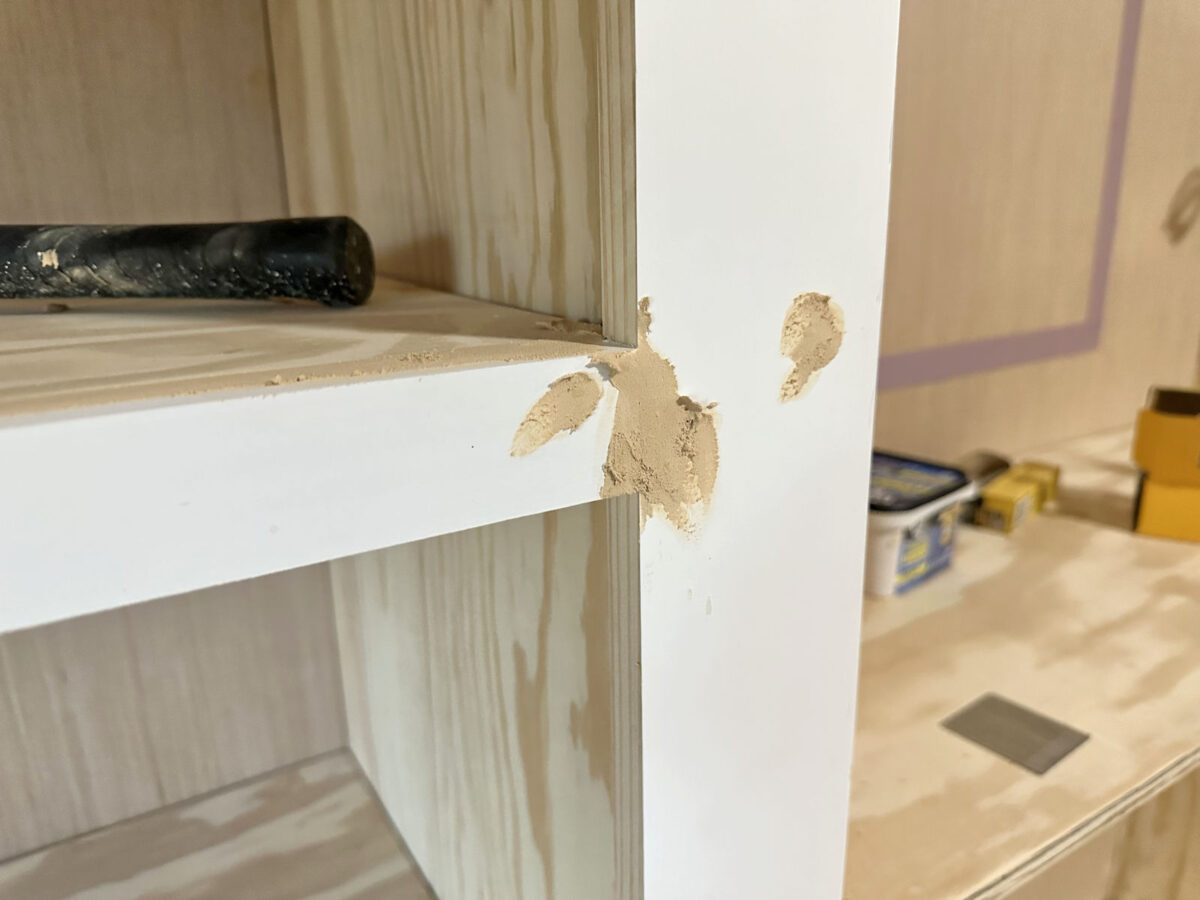
But I did use wood filler where the trim and the plywood shelf meet on top of the shelves because that can be easily sanded with my rotary sander and leave a perfectly smooth transition between the two pieces.

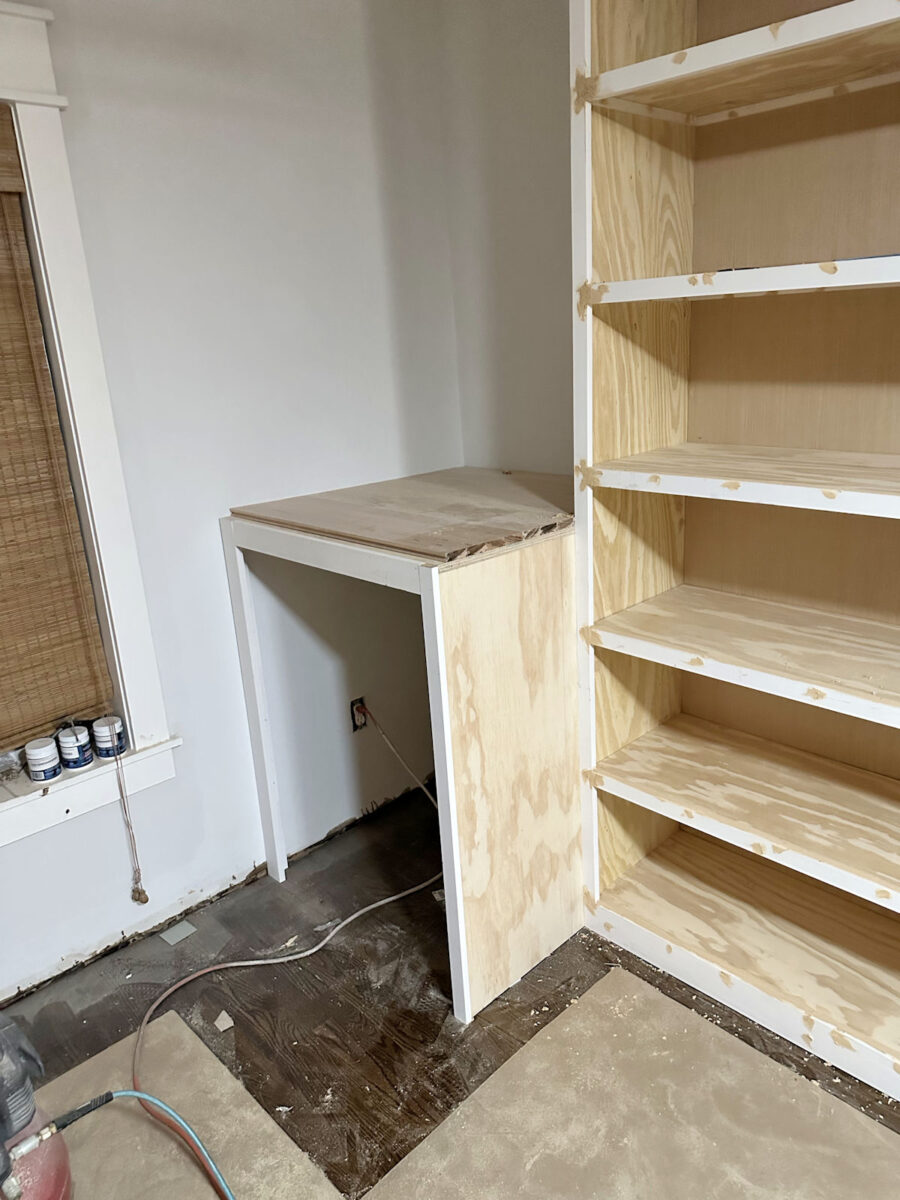
I’ll wait until the other side is trimmed out and the wood filler has had time to dry on that side before I start sanding so that I can do it all at once. So this is where I left things last night. I also didn’t do any wood filling on the washer cabinet because I still need to remove that top trim piece and rip it down just a bit for my washer to fit inside the cabinet.
To remedy my mistake on the top trim pieces where I had mitered the corners instead of cutting them straight, I used my Dremel Multi-Max to cut off the excess from those boards that stuck out past the edge of the cabinet. The cut was pretty rough at first, so then I used my rotary sander with 80-grit sanding discs to sand it smooth. And then I piled on the wood filler to fill in between the pieces. When I attach the crown molding, that will wrap around the sides of the cabinets by the door and by the appliances and will continue around the room.
I repeated that process on the other end where I had mistakenly cut the piece at a 45-degree angle.
Repairing that mistake this way was a whole lot easier than removing the entire long piece that had been nailed in place with 16-gauge 2-inch nails, removing all of those nails, dragging that 140-inch piece back through the house and into the carport to cut off that mitered corner, and then wrestling with that long piece to get it nailed back into place.
So that’s the weekend progress! It’s really starting to take shape now.
The bottom molding (i.e., the baseboards) will wrap around the base of the tall cabinets as well as the base of the washer cabinet to tie those sections together and finish off everything along the floor.
I’ll also be adding baseboards inside the washer and dryer cabinet to finish off the bottom of the walls.
And you’ll notice that I didn’t add trim to this piece in the center section. This is going to be my glass-top earring and ring drawer, so this plywood will be removed. I’m still trying to determine exactly how I want this storage designed.

There are two ways that I can do it. The first and most obvious way is to build a regular drawer that pulls out so that I can access my earrings and rings. The second option would be to build a storage compartment that doesn’t pull out like a drawer, but instead, the earrings and rings are accessed by putting the glass top on hinges that raises up to access those items. I kind of like both ideas, so I haven’t settled on one just yet.
Of course, the benefit of making it a drawer is that I can set things on top of the glass countertop, and with it being a drawer that pulls out, those items on top won’t be disturbed. If I make the glass top on hinges that raises up for accessing the earrings and rings, I won’t be able to set anything on top of that glass area. It will have to remain free and clear of any items that will block access. But I still like the idea. So I’m going to hold off on doing anything with that middle section until I have the details worked out. I’m almost 100% sure that I’ll end up with another shelf in that section once I decide exactly how I want to store my necklaces there.
Anyway, it was kind of a slower weekend with me taking off on Friday, but at least there was some progress! And I’m finally to the fun stuff!
The A2D Daily:

Addicted 2 Decorating is where I share my DIY and decorating journey as I remodel and decorate the 1948 fixer upper that my husband, Matt, and I bought in 2013. Matt has M.S. and is unable to do physical work, so I do the majority of the work on the house by myself. You can learn more about me here.