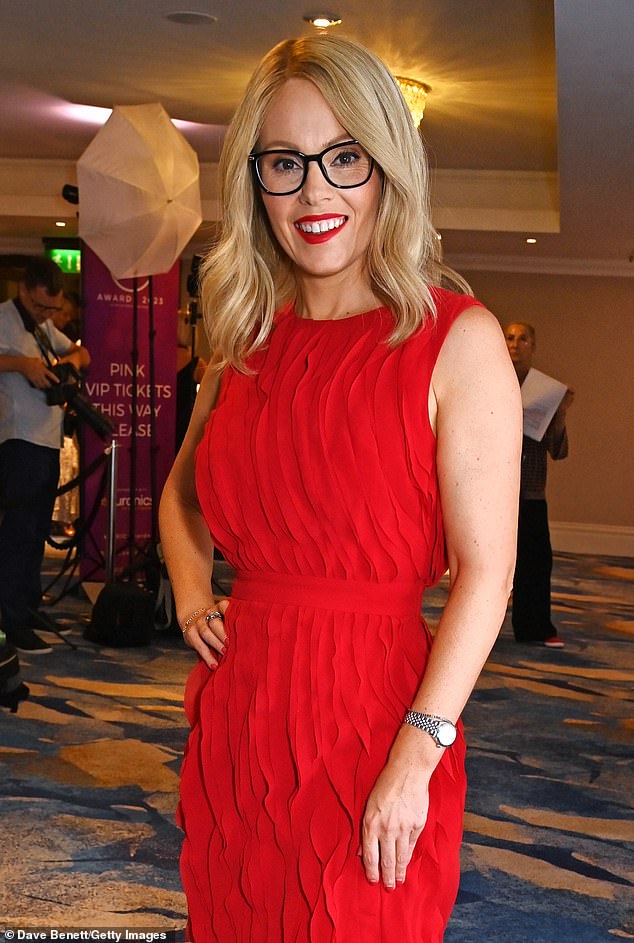
Michelle Dewberry cancelled her Virgin Active membership over the gym’s changing room policy, the GB News presenter has revealed in a series of tweets.
The 45-year-old host of Dewbs & Co said she took the decision after ‘encountering a man in the female changing room’ and was dissatisfied by Virgin Active’s response to her concerns.
Dewberry, who won the second season of The Apprentice, shared a screenshot of the gym’s reply to her email seeking clarification about its policy that read: ‘The changing rooms are split between female and male, with children attending up to the age of eight-years-old of a different gender.
‘For the female changing rooms in particular, this would cover females of all ages, boys up to the age of eight, transgender females, and non-binary members.’
As a result, she told her followers, Dewberry had written back asking for her membership to be cancelled as she asked: ‘Whatever happened to our right to a single-sex changing space?
‘If you are among the minority of woman [sic] who are comfortable sharing your single-sex changing room with adult males, I completely respect that.
‘But what about the majority of us who aren’t?’
Dewberry did not elaborate further on the alleged encounter in the female changing room.
Michelle Dewberry cancelled her Virgin Active membership over the gym’s changing room policy, the GB News presenter has revealed in a series of tweets
The 45-year-old host of Dewbs & Co said she took the decision after ‘encountering a man in the female changing room’ and was dissatisfied by Virgin Active’s response to her concerns.
Guidance issued by the Equality and Human Rights Commission (EHRC) in 2022 said it is legal for gyms to limit these communal spaces to a single-sex as long as a gender-neutral changing room is also provided for trans people.
MailOnline has contacted Virgin Active for comment.
Britain’s human rights body said that service providers wishing to limit services to a single sex are legally able to do so, provided the reasons are justified and proportionate.
Dewberry’s post divided X as some users agreed it was unfair that ‘the men’s [changing room] is the men’s and the women’s is a free-for-all’.
Others questioned whether Virgin Active provided ‘communal changing rooms, where you strip in front of each other? Or do they have individual cubicles?’
‘I had the same issue a number of years ago and also cancelled my membership,’ one user replied to Dewberry.
It comes after British fitness influencer Natalee Barnett faced fierce criticism for refusing to allow trans women to train at her female-only gym as the equality law now divides the UK’s health clubs and training centres.
Barnett, 25, devised the idea behind The Girl Spot gym, which is due to open soon in Wandsworth, south London, after experiencing sexual harassment at her gym.
Dewberry did not elaborate further on the alleged encounter in the female changing room
‘The staring, mansplaining, being touched, having my space invaded and feeling intimidated – women deserve to be in the gym as much as any other person,’ she told Femail in 2021.
‘I also experienced sexual assault inside the gym when I was 18 years old.’
Fuelled by her negative experiences Barnett began raising funds to start her own gym in 2021, as she promised that the space would be open to trans women.
‘Of course, trans women are welcome at my women-only gym,’ she said in a TikTok in 2021.
Four years later, and with over £22,900 in GoFundMe donations, Barnett backtracked on her initial objective, stating that the gym is no longer trans-inclusive and will only serve as a ‘safe space for biological women’, as her ‘transphobic’ decision sparked outrage online.
Critics also called Barnett out for accepting donations on the basis that her gym would cater to trans women – who were born male but now identify as female – before reversing her decision.
‘To every trans woman who donated or supported this endeavour, I’m sorry you were lied to,’one X user wrote.
Another added: ‘Trans women are women, and your desire to exclude them speaks loudly that you still see them as men. Women should be able to be protected no matter how they show up.
It comes after British fitness influencer Natalee Barnett faced fierce criticism for refusing to allow trans women to train at her female-only gym as the equality law now divides the UK’s health clubs and training centres
Barnett was branded ‘transphobic’ and criticised for accepting donations to build the space on the basis that it would also be open to trans women, as she promised in 2021
‘If you want to create a safe space for women, create a safe space for all women and recognize the alarmingly high rate of violence that trans women face at the hand of men every single day.’
However, Fiona McAnena, director of campaigns at human rights charity Sex Matters, told The Telegraph that Barnett is ‘well within her legal rights’ to implement the single-sex rule.
‘There are thousands of gyms in the country, almost all open to both sexes. It’s very telling that there is so much vitriol aimed at one woman running one small gym, just because she wants a male-free space,’ McAnena said.
Others have branded the plan unfeasible, claiming that Barnett would have to subject women to ‘genital checks’, or as transgender broadcaster India Willoughby told The Telegraph put it, ‘Undie inspections’ for women who ‘look trans’.
Defending herself on social media, Barnett said her decision had not been ‘made lightly’.
‘I spent a great deal of time and money including seeking legal advice and it was absolutely not a choice made lightly or out of exclusion or malice, but rather out of my commitment to ensuring a space where women who have experienced trauma, harassment, or discomfort in co-ed gyms can feel at ease, she wrote.